
Report Data Entry
Simplify on-site data entry with a system that keeps your narratives organized and easy to re-use.
Part 1
Entering Inspection Findings
Open a report that has been created and navigate to a system, such as Roofing.

Expand an Inspection Subject, such as Roof Coverings / Materials.

The Description, Condition, Replacement Timeline, Risk, Location, and Additional Notes have the following features as part of the Eneris Smart Fields system:
-
Pre-written Narratives: Every Eneris account includes pre-loaded narratives for inspection items that are commonly encountered in the field, such as: plumbing materials, manufacturers of HVAC and Electrical equipment, risks likely to occur as a result of inspection findings, etc.
-
Automatic Searching: Simply start typing keywords and Eneris will search for the most relevant narratives and suggest them automatically.
-
Automatic Learning: Need to type text into a field to add inspection findings? The entry will automatically be saved for next time and is connected to the template being used.
-
Speech to Text: Tap the Microphone icon on the keyboard of your device when using the iOS or Android App and speak to automatically type your notes into Eneris.
Part 2
Customizing Narratives
The pre-loaded text entries in any field can be customized. Scroll to the bottom of a report system, such as Roofing, and click Edit/Remove.

Scrolling back up and expanding an Inspection Subject, such as Roof Coverings / Materials now displays an Edit List icon next to each smart field.

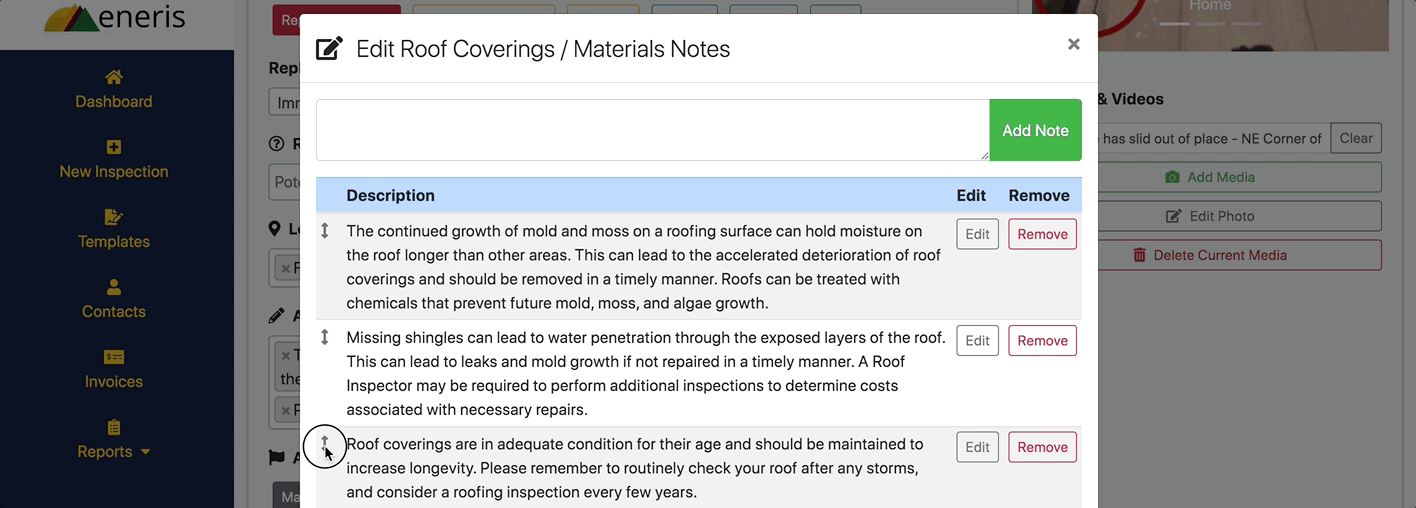
Clicking the Edit List icon next to Additional Notes opens a pop-up window with the ability to View, Add, Edit, Remove, and Reorder narratives as needed.

Click and drag the ⬍ arrow icon upwards to move the item up the list. Release the mouse button to drop the item into its new location on the list.
Part 3
Customizing Recommended Actions
Recommended Actions buttons are important tools in conveying inspection findings to your clients.

Each Recommended Action button can optionally prompt for a Timeline.
See the following examples of how the
Repair or Replace button and Replacement Timeline looks in both the PDF and Web sample reports:


To customize Recommended Actions, navigate to Settings -> Report Setup, then scroll down to Recommended Action Settings. Changes made will be reflected on any new reports created after the change is made.
